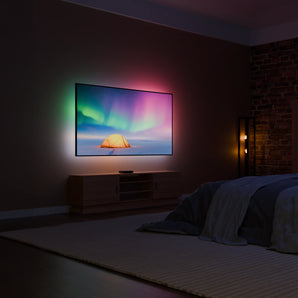
Att installera din AmbiSync 2 är snabbt och enkelt. Oavsett om du kallar det en TV-ambientbelysning, HDMI-synkroniserad bakgrundsbelysning eller en dynamisk LED-list, kommer denna uppgradering att förändra hur du tittar på film, spelar spel och upplever underhållning. Följ dessa steg för att installera din BULP AmbiSync 2 korrekt och ta din upplevelse till en helt ny nivå.
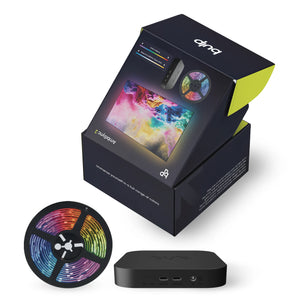
1. Packa upp ditt kit – Din AmbiSync 2-upplevelse börjar nu
Ta försiktigt ut ditt AmbiSync LED-bakgrundsbelysningskit ur förpackningen. I lådan hittar du:
LED-listen
Strömadaptern
BULP HDMI-synkboxen
Alla nödvändiga kablar
Se till att du har allt innan du börjar installationen.
2. Placera LED-listerna – Jämn belysning, maximal effekt
För bästa ambientbelysning, fäst BULP:s reaktiva bakgrundsbelysningslister på baksidan av din TV. Följ dessa steg för optimal placering:
Börja i det nedre vänstra hörnet av TV:n.
Fäst LED-listen och följ skärmens kontur medurs.
Se till att LED-lamporna är jämnt fördelade för en balanserad och omslutande ljuseffekt.
Detta säkerställer att ditt AmbiSync LED TV-belysningssystem ger smidiga och dynamiska färgövergångar utan mörka områden eller ojämnheter.
3. Anslut HDMI-kablarna – Hjärtat i din dynamiska belysning
Ditt BULP HDMI-synkroniserade belysningssystem speglar innehållet på skärmen i realtid. Så här ansluter du det korrekt:
Anslut BULP HDMI-kabeln till HDMI-utgången på synkboxen.
Anslut din TV-box, Chromecast, spelkonsol eller streaming-enhet till HDMI-ingången på synkboxen.
Sätt i LED-listkabeln i ”LED Strip”-porten för att slutföra anslutningen.
När allt är inkopplat är ditt intelligenta LED-bakgrundsbelysningssystem redo att reagera på varje scen i dina favoritfilmer, serier och spel.
4. Anslut strömmen – Dags att tända upp
Anslut AmbiSync 2-strömadaptern till ett eluttag. När den är påslagen börjar din LED-synkbakgrundsbelysning genast anpassa sig i realtid till innehållet på skärmen och skapa en levande ljusupplevelse.
5. Slå på din TV – Luta dig tillbaka och njut
Slå på TV:n och se hur HDMI-bakgrundsbelysningssystemet automatiskt synkroniseras med ditt innehåll – inga appar, ingen komplicerad installation, bara ren inlevelse. AmbiSync 2 TV-belysningskitet anpassar sig automatiskt till bilden och ger en bioliknande upplevelse från första stund.