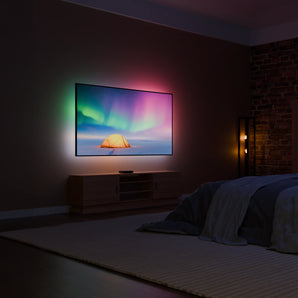
Det er raskt og enkelt å komme i gang med din AmbiSync 2. Enten du kaller det en TV-ambient lysstripe, HDMI-synkronisert bakgrunnsbelysning eller en dynamisk LED-stripe, vil denne oppgraderingen forvandle måten du ser filmer, spiller og opplever underholdning på. Følg disse trinnene for å installere din BULP AmbiSync 2 riktig og oppnå en helt ny nivå av innlevelse.
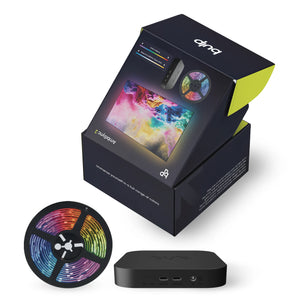
1. Pakk ut settet – Din AmbiSync 2-opplevelse starter nå
Ta forsiktig ut AmbiSync LED-bakgrunnsbelysningssettet fra emballasjen. Inni esken finner du:
LED-stripen
Strømadapteren
BULP HDMI-synkboksen
Alle nødvendige kabler
Sørg for at du har alle delene klare før du begynner installasjonen.
2. Plasser LED-stripene – Jevn belysning, maksimal effekt
For den beste omgivelsesbelysningen, fest BULP reaktive bakgrunnsbelysningsstriper på baksiden av TV-en din. Følg disse trinnene for optimal plassering:
Start i nedre venstre hjørne av TV-en.
Fest LED-stripen og følg kanten med klokken rundt skjermen.
Sørg for at LED-lysene er jevnt fordelt for en balansert og oppslukende belysning.
Dette sikrer at AmbiSync LED-TV-belysningssystemet gir jevne, dynamiske fargeoverganger uten mørke flekker eller ujevnheter.
3. Koble til HDMI-kablene – Kjernen i din dynamiske belysning
BULP HDMI-synkroniseringsbelysning gjenspeiler innholdet på skjermen din i sanntid. Slik kobler du det riktig opp:
Koble BULP HDMI-kabelen til HDMI-utgangen på synkboksen.
Koble til din TV-boks, Chromecast, spillkonsoll eller strømmeenhet i HDMI-inngangen på synkboksen.
Sett inn LED-stripekabelen i "LED Strip"-porten for å fullføre tilkoblingen.
Når alt er tilkoblet, er ditt intelligente LED-bakgrunnsbelysningssystem klart til å reagere på hver scene i dine favorittfilmer, serier og spill.
4. Koble til strøm – La lysshowet begynne
Koble AmbiSync 2-strømadapteren til en stikkontakt. Så snart enheten er slått på, vil din LED-synkroniserte bakgrunnsbelysning gi levende omgivelseslys som tilpasser seg skjerminnholdet i sanntid.
5. Slå på TV-en – Len deg tilbake og nyt
Slå på TV-en og se hvordan HDMI-bakgrunnsbelysningssystemet umiddelbart synkroniseres med innholdet ditt – ingen apper, ingen komplisert oppsett, bare ren innlevelse. AmbiSync 2 TV-lyssettet justerer seg automatisk etter bildet og gir en kinoaktig opplevelse fra det øyeblikket du slår på TV-en.